Components
Component Basics
Components are the fundamental building blocks of an Angular application. Each component consists of a TypeScript class, an HTML template, and optional CSS styles. The @Component decorator provides metadata including the selector, template URL or inline template, and style URLs.
import { Component } from '@angular/core';

@Component({
  selector: 'app-hello',
  template: `<h1>Hello, {{ name }}!</h1>`,
  styles: [`h1 { color: #dd0031; }`]
})
export class HelloComponent {
  name = 'Angular';
}
Component Selector
The selector defines how the component is used in HTML. It can be an element selector ('app-hello'), an attribute selector ('[app-hello]'), or a class selector ('.app-hello'). Element selectors are the most common.
Lifecycle Hooks
Angular components have a well-defined lifecycle. You can hook into key moments by implementing lifecycle hook interfaces:
ngOnInit
Called once after the component is initialized and inputs are bound. Use it for initialization logic, fetching data, or setting up subscriptions.
ngOnInit() {
  this.loadUserData();
}
ngOnChanges
Called whenever input properties change. Receives a SimpleChanges object with current and previous values.
ngOnChanges(changes: SimpleChanges) {
  if (changes['userId']) {
    this.reloadData();
  }
}
ngAfterViewInit
Called after the component's view (and child views) have been rendered. Safe to access @ViewChild elements here.
ngAfterViewInit() {
  console.log('View initialized', this.myElement);
}
ngOnDestroy
Called just before the component is destroyed. Use it to clean up subscriptions, timers, or event listeners to prevent memory leaks.
ngOnDestroy() {
  this.subscription.unsubscribe();
  clearInterval(this.timer);
}
ViewEncapsulation
Angular emulates Shadow DOM to scope component styles. Three strategies are available:
- Emulated (default) — Styles are scoped using attribute selectors without native Shadow DOM.
- ShadowDom — Uses the browser's native Shadow DOM API for true style isolation.
- None — Styles are global and not scoped to the component.
@Component({
  selector: 'app-card',
  templateUrl: './card.component.html',
  encapsulation: ViewEncapsulation.ShadowDom
})
@Input and @Output
Components communicate with each other using @Input and @Output decorators.
@Input
Binds a property to a value passed from a parent component:
@Input() userName: string = '';
@Input('aliasTitle') title: string = '';
@Output with EventEmitter
Emits events to the parent component:
@Output() userSelected = new EventEmitter<User>();

selectUser(user: User) {
  this.userSelected.emit(user);
}
The parent listens like this: <app-user (userSelected)="onUserSelected($event)"></app-user>.
@ViewChild
Access a child component, directive, or DOM element from the parent component class:
@ViewChild('submitBtn') submitButton!: ElementRef;
@ViewChild(ChildComponent) child!: ChildComponent;

ngAfterViewInit() {
  this.submitButton.nativeElement.focus();
  this.child.doSomething();
}
Services in Components
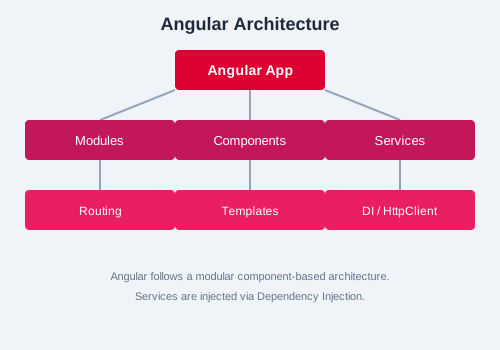
Services provide shared logic, data access, or state management. They are injected into components via the constructor:
constructor(private userService: UserService) { }

loadUsers() {
  this.userService.getUsers().subscribe(users => this.users = users);
}
Content Projection with ng-content
Project content from a parent into a child component using <ng-content>:
<!-- card.component.html -->
<div class="card">
  <ng-content select="[card-header]"></ng-content>
  <ng-content select="[card-body]"></ng-content>
</div>
Dynamic Components
Load components at runtime using ComponentFactoryResolver (legacy) or the newer ViewContainerRef approach with standalone components. This is useful for modals, tabs, or dashboards where components are determined dynamically.
ViewContainerRef.createComponent method does not require ComponentFactoryResolver when used with standalone components.Angular Elements
Angular Elements allow you to package Angular components as custom elements (Web Components) that can be used in any HTML page, even outside Angular applications. Use @angular/elements and the createCustomElement function.
UserCardComponent with @Input() user and @Output() delete. Add lifecycle hooks: ngOnInit to log user data, and ngOnDestroy to log cleanup. Use content projection to inject a custom footer into the card. Use the component in your app with a list of users and handle the delete event.