Props & State
Understanding Props
Props (properties) are the mechanism by which data flows from a parent component to a child component in React. They are read-only, meaning a child component cannot modify the props it receives. This unidirectional data flow ensures that the application is predictable and easier to debug.
// Parent passing props
function App() {
  return <User name="John" age={30} isActive={true} />;
}

// Child receiving props
function User(props) {
  return (
    <div>
      <h2>{props.name}</h2>
      <p>Age: {props.age}</p>
      {props.isActive && <span>Active</span>}
    </div>
  );
}
The Children Prop
The children prop is a special prop that allows you to pass JSX content between the opening and closing tags of a component. This is useful for creating wrapper or layout components.
function Card(props) {
  return (
    <div className="card">
      {props.children}
    </div>
  );
}

// Usage
<Card>
  <h2>Card Title</h2>
  <p>This content is passed as children.</p>
</Card>
Prop-Types Validation
React provides a built-in type-checking feature called PropTypes to validate the props that a component receives. This helps catch bugs during development by warning you when props of the wrong type are passed.
import PropTypes from 'prop-types';

function Product({ name, price, category }) {
  return (
    <div>
      <h3>{name}</h3>
      <p>${price} - {category}</p>
    </div>
  );
}

Product.propTypes = {
  name: PropTypes.string.isRequired,
  price: PropTypes.number.isRequired,
  category: PropTypes.string,
};

Product.defaultProps = {
  category: 'General',
};
State in React
State represents the data that changes over time in a component. Unlike props, state is managed internally by the component and can be updated using setter functions. When state changes, React re-renders the component to reflect the new values.
State in Class Components (Legacy)
class Counter extends React.Component {
  constructor(props) {
    super(props);
    this.state = { count: 0 };
  }

  increment = () => {
    this.setState({ count: this.state.count + 1 });
  };

  render() {
    return (
      <div>
        <p>Count: {this.state.count}</p>
        <button onClick={this.increment}>+</button>
      </div>
    );
  }
}
State in Functional Components (Modern)
import { useState } from 'react';

function Counter() {
  const [count, setCount] = useState(0);

  return (
    <div>
      <p>Count: {count}</p>
      <button onClick={() => setCount(count + 1)}>+</button>
    </div>
  );
}Stateless vs Stateful Components
A stateless component (also called a presentational or dumb component) does not manage any state of its own. It receives data via props and renders it. A stateful component (also called a smart or container component) manages state and often passes it down to stateless children.
// Stateless (presentational)
function UserDisplay({ name, email }) {
  return <div>{name} ({email})</div>;
}

// Stateful (container)
function UserContainer() {
  const [user, setUser] = useState(null);
  // fetch user data...
  return <UserDisplay name={user.name} email={user.email} />;
}
Lifecycle with Hooks
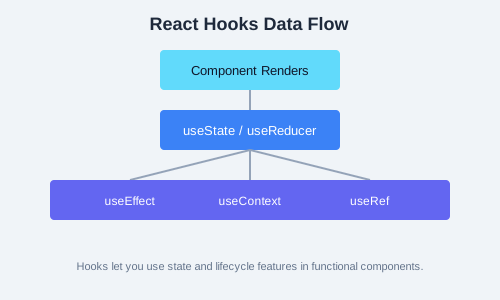
The useEffect hook combines the functionality of three class component lifecycle methods: componentDidMount, componentDidUpdate, and componentWillUnmount.
import { useState, useEffect } from 'react';

function Timer() {
  const [seconds, setSeconds] = useState(0);

  // componentDidMount + componentDidUpdate
  useEffect(() => {
    const interval = setInterval(() => {
      setSeconds(s => s + 1);
    }, 1000);

    // componentWillUnmount (cleanup)
    return () => clearInterval(interval);
  }, []); // Empty dependency array = run once on mount

  return <p>Timer: {seconds}s</p>;
}useEffect controls when the effect runs. An empty array means it runs only on mount. Omitting the array means it runs after every render. Including specific variables means it runs only when those variables change.
Lifting State Up
When multiple components need to share the same state, it is a best practice to lift the state up to their closest common ancestor. This parent component then passes the state and event handlers down as props.
function TemperatureCalculator() {
  const [temperature, setTemperature] = useState('');

  return (
    <div>
      <Input temp={temperature} onTempChange={setTemperature} />
      <Display temp={temperature} scale="c" />
      <Display temp={temperature} scale="f" />
    </div>
  );
}
Practice Task
Build a simple TodoList application. Create a parent component that holds an array of todo items in state. Render each todo item using a stateless TodoItem component. Add an input field and a button to add new todos to the list. Use prop-types to validate the props of TodoItem.